


Care & Maintenance
When to Sharpen Your Katana (and When Not To)
Most sharpening mistakes happen before the whetstone ever touches the blade. Owners sharpen too early, too often, or at the wrong angle, and each pass removes steel that cannot be put back. A katana edge is a finite resource. Spend it wisely.
This guide covers the practical decision-making behind katana sharpening: what the factory edge actually is, how to read wear honestly, when to leave the blade alone, and how to stretch the life of a good edge through proper maintenance.
Factory Edge vs. Working Edge
When your katana ships from Longquan, the edge has been set on a belt grinder or coarse wheel, then refined through progressively finer grits. It is sharp enough to shave arm hair and cut paper cleanly. What it is not is a polished edge.
A true working edge, finished by hand on Japanese water stones up through 6000 or 8000 grit, feels different. The bevel is mirror-smooth, the geometry is consistent from habaki to kissaki, and the blade will push-cut newspaper without any tearing at the tip. That takes 4 to 8 hours of careful hand work by someone who knows the blade’s geometry.
The factory edge on most production katana is functional and honest. On higher-grade blades like the Ink Meteor, which uses a three-layer sanmai construction with a hard high-carbon core, the factory edge is already close to working quality. On T10 steel blades the edge holds well because T10 responds cleanly to fine sharpening. Knowing what steel you have matters before you touch anything.
Our steel comparison guide breaks down how T10, T8, and laminated steels each behave under sharpening, and what grit progressions work best for each.
Signs You Need to Sharpen
The Paper Test
Hold a sheet of printer paper by the top edge and draw the blade through it in a single pull. A sharp katana cuts a clean line with no tearing. Tearing at the middle of the cut means the edge is uneven. Tearing throughout means the edge is dull. This test takes ten seconds and tells you more than running a thumb along the edge ever will.
The Thumbnail Test
Lay the edge lightly on your thumbnail at about 45 degrees. A sharp edge will catch and hold without sliding. A dull edge skates forward. Do this gently, and do it at several points along the blade, because edges wear unevenly. The area near the kissaki typically dulls first under practice cuts.
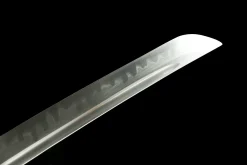
Visible Edge Damage
Inspect the edge in raking light, holding the blade at a low angle to a lamp or window. A sharp edge disappears into a line you can barely see. Dull spots reflect light back at you as small bright points or flats. Chips show as jagged bright notches. If you see chips, sharpening alone will not fix the problem cleanly. Reprofiling or professional work is the right call.

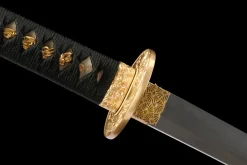
Ink Meteor
Three-layer sanmai construction, hard carbon core. $775.

Silent Thunder
T10 high speed tool steel, clay tempered. $280.

Dark Ravine
T10 high speed tool steel, differentially hardened. $340.
When NOT to Sharpen
The most common mistake is sharpening a blade that is simply dirty or oxidized. A thin layer of surface rust or oil residue can make an edge feel duller than it is. Clean the blade thoroughly first with choji oil and a soft cloth, then re-test. Half the time, sharpening is not needed.
Do not sharpen a display piece or antique katana without consulting a professional polisher first. Historical blades often carry a traditional hadori polish that took days to apply. One pass on a modern water stone removes that finish permanently. Once it is gone, restoring it costs more than most production swords are worth.
Avoid sharpening if you are not confident in maintaining the original bevel angle. Most katana leave our shop with an edge bevel between 10 and 15 degrees per side. Sharpening at the wrong angle rounds the edge over time, creating a convex bevel that looks sharp but cuts poorly. If you cannot hold a consistent angle freehand, use an angle guide or send the blade out.
Also, never sharpen right after a hard cutting session without inspecting the blade first. Impact against a target can introduce micro-deformation along the edge. Sharpening over a bent edge compounds the problem rather than fixing it.
DIY vs. Professional Sharpening
What You Can Reasonably Do at Home
Maintenance sharpening on a blade you know well is absolutely a home task, provided you have the right stones. Start with a 1000-grit water stone to address any dulling, move to 3000 grit to refine the bevel, and finish on 6000 or higher for a working edge. Strop on leather loaded with green compound to align the final edge. Keep the stone wet, use light pressure, and count your strokes to keep both sides even.
When to Call a Professional
Send the blade out for chips larger than 0.5mm, for a bevel that has been visibly altered from its original geometry, or for any blade above $500 in value. A professional polisher working in the Japanese tradition can reestablish the hamaguri-ba (clam-shell convex bevel) geometry that factory grinding approximates but rarely achieves perfectly. That geometry is part of what makes a katana cut cleanly rather than just slice.
For blades you are considering as a long-term investment, our buying guide covers which steel types and construction methods justify professional polishing costs over time.
Maintaining the Edge Between Sharpenings
A good edge maintained properly needs sharpening perhaps twice a year under regular practice use, and far less under display conditions. The single biggest factor is oil. Wipe the blade clean after every handling session and apply a thin, even coat of choji oil before returning it to the saya. Oil does not sharpen anything, but it stops the micro-corrosion that roughens an edge between uses.
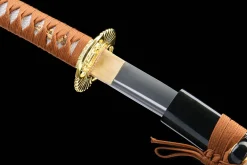
When drawing from the saya, pull at a slight angle rather than straight out. This reduces friction on the edge against the saya mouth, which is one of the most common causes of edge dulling that owners never identify. Most people blame the target. The saya is usually the culprit.
Store the blade horizontally or edge-up on a stand. Edge-down storage puts continuous pressure on the thinnest part of the steel over time. It is a small force, but over months it matters.
For a full breakdown of cleaning routines, oiling schedules, and saya maintenance, see our sword care guide. Consistent maintenance is what separates a blade that holds its edge for years from one that needs constant attention.
Browse our full range of katana, including options in Damascus steel, to find the construction that fits how you plan to use and maintain your blade.