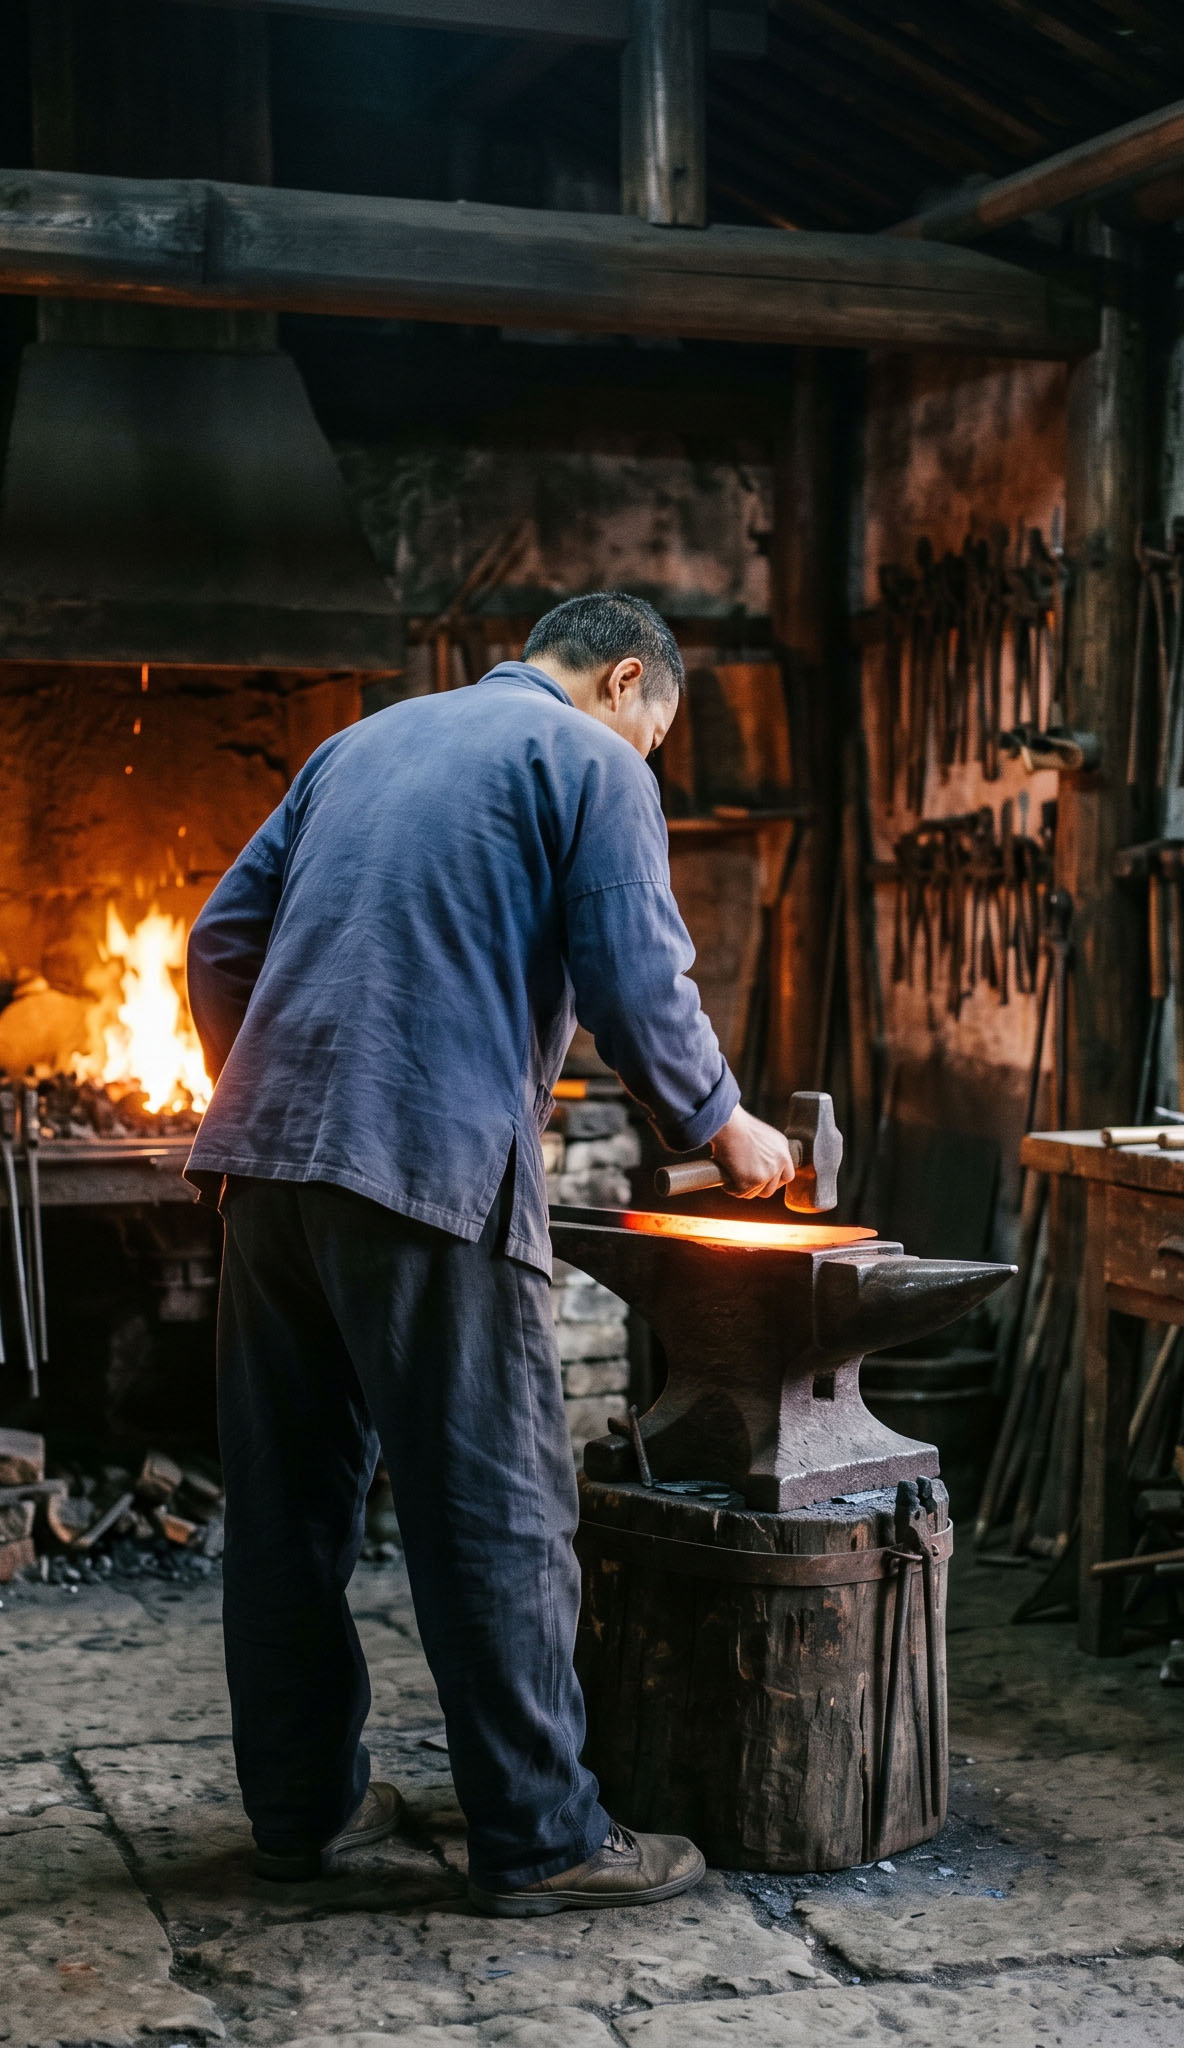


Most people pick up a katana and feel the balance, the weight, the way it sits in the hand. Few know why it feels that way. Every dimension, every material, every component has a reason behind it, and those reasons were worked out over centuries of actual use in combat. Understanding the parts of a katana is not trivia. It is how you tell a real sword from a display piece, and how you know whether what you are buying is worth the money. This guide covers every major component, from the tip of the blade down to the end of the scabbard. We will use the correct Japanese terms throughout, because they are precise in ways that English translations often are not. The blade is not one uniform piece of steel. A well-made katana blade has distinct zones, each serving a specific mechanical purpose. Learning to read those zones tells you more about a sword’s quality than any product description will. The ha (hah) is the cutting edge of the blade. On a properly forged katana, this is the hardest part of the sword, typically reaching HRC 58-62 depending on the steel and tempering method. That hardness is what allows the edge to hold geometry under impact without folding over. What most buyers miss is that the ha should not be perfectly uniform along its length. A hand-ground edge will have subtle variation in the bevel angle, slightly more acute toward the kissaki where cutting precision matters, and slightly more robust near the base where chopping force is highest. Machine-ground edges are consistent, which sounds good until you realize consistency in this context means the grinder operator made one setting and walked away. The mune (moo-neh) is the back of the blade, opposite the edge. This is where the blade is thickest, typically 6-8mm at the base on a standard katana. The mune absorbs impact that would otherwise crack a thinner spine, and its thickness tapers as you move toward the tip. On a differentially hardened blade, the mune is intentionally left softer, around HRC 40-45. This is not a flaw. Soft spine, hard edge: that is the structural logic of a katana. The spine flexes slightly under stress rather than snapping. The shinogi (shee-noh-gee) is the longitudinal ridge that runs along the side of the blade, dividing the flat face into two distinct planes. The area between the shinogi and the edge is called the shinogi-ji, and it is ground at an angle to form the blade’s geometry. The shinogi is one of the first things we check on any blade coming out of our workshop. A straight, consistent ridge line from base to tip means the geometry was ground with control. A shinogi that wanders or loses definition toward the kissaki tells you the grinder rushed the final work. You can run your thumb lightly along it, without touching the edge, and feel immediately whether it holds true. The kissaki (kee-sah-kee) is the tip section of the blade, defined by a curved boundary line called the yokote. Most katana carry a chu-kissaki (medium tip), which balances thrusting capability with structural integrity. A larger o-kissaki shifts weight forward and increases cutting power on draw cuts. A smaller ko-kissaki reduces tip mass for faster handling. Grinding a kissaki correctly is arguably the most technically demanding part of making a katana. The geometry has to resolve from three planes – the shinogi face, the ha bevel, and the tip bevel – into a single sharp point without creating a weak spot. When a kissaki chips on first use, the geometry was wrong at the grind stage. The hamon (hah-mon) is the visible boundary between the hardened edge and the softer body of the blade, created by differential hardening. Traditional clay tempering applies a clay mixture across the blade body before quenching, insulating those areas and leaving the edge fully exposed to the rapid cooling that creates martensite – the crystalline structure responsible for hardness. No two hamon are identical. The pattern is influenced by clay thickness, quench temperature, water temperature, and the exact carbon content of the steel. A straight hamon (suguha) indicates deliberate restraint. A wildly undulating hamon (notare or gunome) reflects a more aggressive clay application. Both are valid. What matters is whether the hamon runs continuously from base to tip without gaps or dead zones, which would indicate inconsistent hardening. For a deeper look at how different steels affect hamon formation, see our steel comparison guide. A katana handle is not a single piece of wood with a grip surface. It is a composite assembly of four or five distinct materials, each doing a specific job. When any one of them is wrong, the whole system fails. The tsuka (tsoo-kah) core is almost always wood, traditionally honoki (Japanese magnolia), though in our workshop we also use hardwoods selected for similar density and moisture resistance. The core is typically shaped in two halves, hollowed to accept the nakago (tang), then glued together before wrapping. Standard tsuka length on a katana runs 26-28cm. A longer tsuka gives more two-handed leverage for cutting. A shorter one suits faster, tighter movements. The length is not arbitrary – it should be proportional to the blade and calibrated to the intended use. The nakago (nah-kah-go) is the unsharpened extension of the blade that runs inside the tsuka. Full tang construction means the nakago runs the entire length of the handle. This is non-negotiable on any sword intended for actual cutting. Partial tang or rat-tail tang designs save manufacturing cost and fail under stress. The force from a cut travels through the blade and into the handle. Without full contact along the entire tsuka length, that force concentrates at the insertion point and eventually splits the handle or pulls free. We have seen it happen. It is not subtle. Beneath the cord wrapping lies a layer of same (sah-meh), genuine rayskin. The pearlescent nodules on rayskin create a rough surface that grips the underside of the cord wrap and prevents it from rotating or sliding. Without same, even tight ito wrapping will shift over time. Cheap swords substitute synthetic materials or skip the same entirely. You can identify proper same by the irregular pearl-grey nodes visible at the edges of the wrapping near the fuchi and kashira. Regular, perfectly uniform texture means synthetic. Slightly irregular, with some nodes larger than others: that is real rayskin. The ito (ee-toh) is the cord wrapped over the same in a crossed diamond pattern. Traditional materials are silk, cotton, or leather, each with different grip characteristics. Silk is traditional and visually refined but requires more maintenance. Cotton is more forgiving in humid conditions. Leather provides the most secure grip when wet. A properly wrapped ito has consistent diamond spacing and uniform tension throughout. The diamonds should be symmetrical, with the same diagonals meeting at the same points on both sides of the handle. Sloppy ito wrapping is not just cosmetic – it indicates the assembly work was rushed, which raises questions about what else was rushed. The mekugi (meh-koo-gee) is a bamboo pin that passes through a hole in the tsuka and a corresponding hole in the nakago, locking the blade into the handle. It is the single most critical safety component in the assembly. Mekugi must be bamboo. Metal pins are harder than the surrounding wood and will split the tsuka over time. Bamboo is harder than the wood core but slightly flexible, and it will shear before the handle does if the sword is subjected to extreme lateral force. That shear is a design feature, not a weakness – a broken mekugi is repairable in minutes. A split handle is not. The menuki (meh-noo-kee) are small decorative ornaments placed under the ito wrapping, one on each side of the tsuka. They are not purely decorative. Positioned correctly, they sit under the palm at the grip points and improve tactile control, helping the hands register position without looking down at the blade. The metal fittings between blade and handle are where a lot of mass-produced swords cut corners. Casting is faster than machining, zinc alloy is cheaper than copper or iron, and most buyers cannot tell the difference until the fittings start shifting or corroding. Here is what each piece does and why the material matters. The tsuba (tsoo-bah) is the guard that sits between the blade and handle. Its primary function is protecting the hand from an opponent’s blade sliding down toward the fingers. Secondary to that is the effect on balance – a heavier tsuba shifts the point of balance back toward the hands, slowing the tip and making the sword feel more controlled. Traditional tsuba were made from iron or copper alloys and were often elaborately pierced or engraved. Working katana used plain iron tsuba because fancy inlay work creates stress concentration points. The diameter typically runs 70-85mm on a standard katana. Anything larger starts to interfere with grip transitions during two-handed technique. The habaki (hah-bah-kee) is a wedge-shaped metal collar fitted around the base of the blade, just above the tsuba. Its job is creating a friction fit with the interior of the saya mouth, keeping the blade seated without a locking mechanism. When you draw the sword and feel that brief resistance at the beginning of the pull, that is the habaki releasing from the koiguchi. A properly fitted habaki seats firmly with no rattle and releases cleanly with moderate draw force. Too tight and you cannot draw quickly. Too loose and the blade shifts inside the saya, which damages both the blade and the scabbard interior. Fitting a habaki is slow hand-work – each one is fitted individually to its saya. The seppa are thin metal washers that sit on either side of the tsuba. Their function is adjusting the fit and preventing the tsuba from rattling against the habaki and fuchi. A sword with two seppa per side has more adjustment tolerance than one with one. A sword with no seppa has been assembled without regard for long-term fit. The fuchi (foo-chee) is the metal collar at the blade end of the tsuka, where it meets the tsuba. The kashira (kah-shee-rah) is the cap at the opposite end of the handle. Both are traditionally made in matching materials and designs, and together they define the aesthetic character of the fitting set. On a properly assembled sword, neither the fuchi nor kashira should have any lateral play. Press them sideways with your thumb. If either shifts, the tsuka assembly is loose, and no amount of ito wrapping will fix that permanently. A saya is not a sheath in the western sense. It is a precision-fitted wooden housing that protects the blade, regulates the environment around the edge, and enables a specific style of draw. Every dimension is functional. The saya (sah-yah) is traditionally constructed from honoki wood – the same species used for the tsuka core. Honoki has low resin content and does not swell dramatically with humidity changes, both of which matter enormously for a piece of wood in continuous contact with a steel blade. High-resin woods trap moisture against the blade and promote rust. Woods that swell with humidity will bind the blade inside the saya, which is dangerous during a draw. The interior of the saya is shaped to hold the blade at one specific contact point near the mouth, with clearance along the rest of the blade’s length. This prevents the edge from touching the wood during storage. If the blade contacts the saya interior along its length, it will dull. You will not see this from the outside. It is one of the reasons buying a saya separately to fit an existing blade requires careful hand-fitting, not just matching a measurement. The koiguchi (koy-goo-chee) is the opening at the mouth of the saya where the blade enters. “Koiguchi” translates roughly to “carp’s mouth,” which describes the slightly tapered oval shape of the opening. The fit between the koiguchi and the habaki is what determines whether the sword is secure in its saya. The koiguchi is reinforced with a water buffalo horn fitting on traditional and quality-production swords. Horn is harder than the surrounding wood and resists wear from repeated drawing and sheathing. Plastic reinforcement is cheaper and softer, and you can see wear marks developing after a few hundred draws. Buffalo horn shows almost no wear under the same usage. The sageo (sah-geh-oh) is the cord attached to a channel cut into the side of the saya, used for securing the scabbard to the obi (belt). Traditional sageo are silk, and they are long enough to allow multiple tying methods depending on whether the sword is being carried edge-up in the traditional fashion or edge-down in older tachi style. The sageo should match the ito in color and material on a properly coordinated sword. It is a small detail, but it tells you whether the person who assembled the sword was thinking about the whole piece or just the parts they were being paid to assemble. For ongoing saya and blade maintenance, our sword care guide covers cleaning, oiling, and storage in detail. You do not need to be a metallurgist to evaluate a katana. You need to know what to look for and where to look. Here is the short version of what we check on every sword that comes through our shop. Draw the blade slowly and feel the habaki release. It should require deliberate force, not slip free on its own, and not require two hands to break loose. That fit tells you whether the saya was shaped to match the blade or just built to approximate dimensions. Check whether the habaki itself is fitted flush to the blade or has visible gaps at the shoulders. Gaps mean it was not fitted – it was installed. Hold the blade at a low angle under a single light source and look for the hamon. A genuine clay-tempered hamon will show internal activity: small crystalline structures called nie (individual martensite crystals) or nioi (clouds of smaller crystals) visible within the transition zone. A false hamon, acid-etched onto a through-hardened blade, looks like a line painted on. It has no internal activity. Both can look similar in photographs – this is why in-person or detailed macro photography matters. Our Damascus steel collection and our full range of katanas each include detailed blade photography for exactly this reason. Push against the tsuka at right angles to the blade. There should be zero movement. Any wobble indicates the mekugi hole alignment is off, the mekugi is the wrong size, or the nakago fit inside the handle was poorly done. Then look at the ito diamonds near the fuchi. If they are crowded or stretched at the transition, the wrapping was done without attention to tension control. The kissaki is the hardest part of the blade to finish correctly, so problems there indicate how much care went into the whole sword. A yokote (the line defining the kissaki boundary) that is clean and continuous says the grinder worked deliberately. A yokote that fades or has a visible seam where two grind angles failed to meet cleanly tells a different story. Before you buy, our katana buying guide walks through the full evaluation process with photographs of what to look for.
The Blade: Where Everything Starts
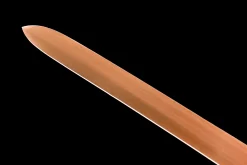
Ha – The Edge (刃)
Mune – The Spine (棟)
Shinogi – The Ridge Line (鎬)
Kissaki – The Tip (切先)
Hamon – The Temper Line (刃文)
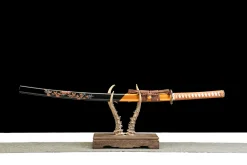
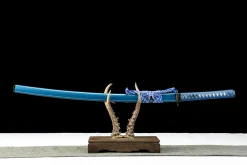
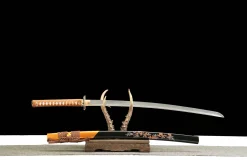
The Handle: Grip, Control, and Safety
Tsuka – The Handle (柄)
Nakago – The Tang (茎)
Same – The Rayskin (鮫)
Ito – The Cord Wrapping (糸)
Mekugi – The Retaining Pin (目釘)
Menuki – The Handle Ornaments (目貫)
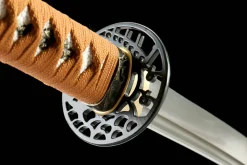
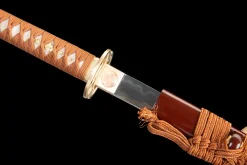
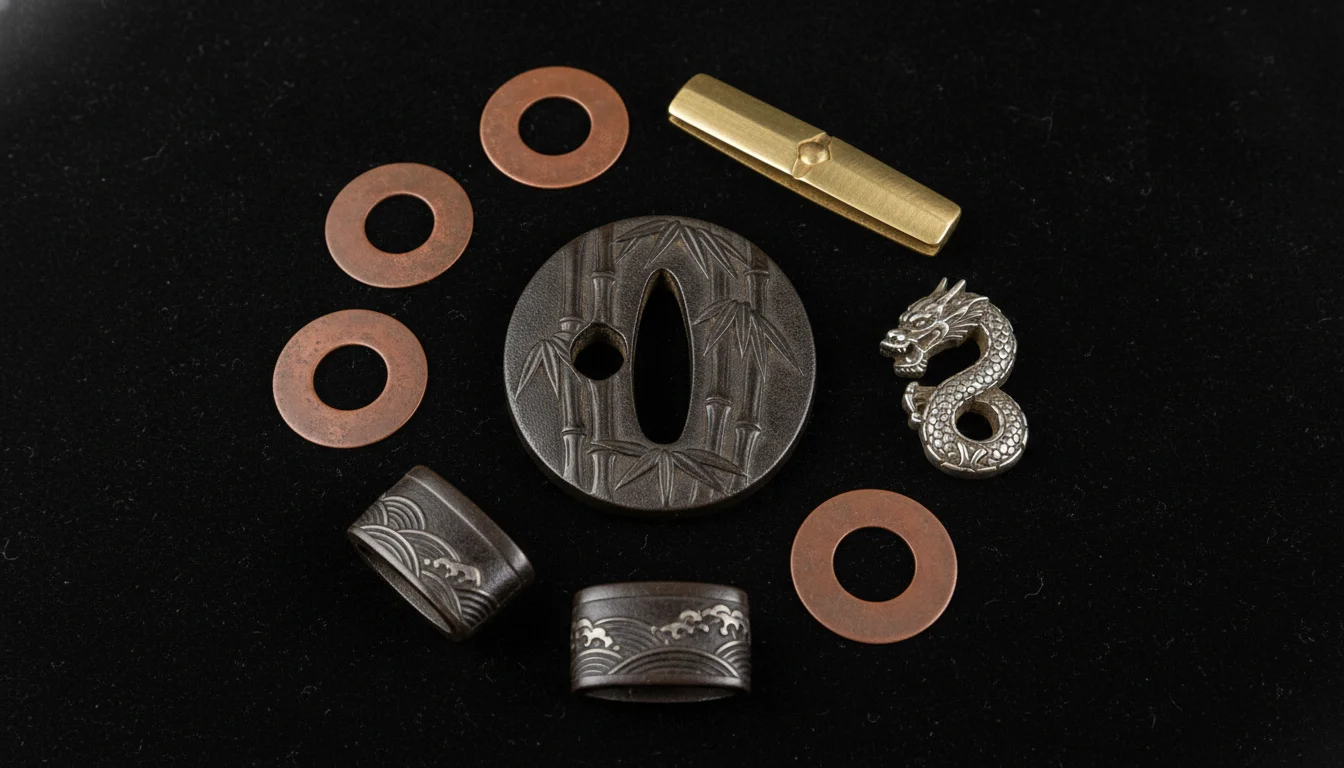
The Guard and Fittings: Precision Hardware
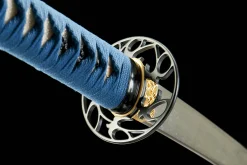
Tsuba – The Hand Guard (鍔)
Habaki – The Blade Collar (鎺)
Seppa – The Spacer Washers (切羽)
Fuchi and Kashira – Collar and Pommel Cap (縁・頭)
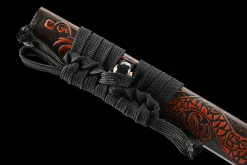
The Scabbard: More Than Storage
Saya – The Scabbard (鞘)
Koiguchi – The Scabbard Mouth (鯉口)
Sageo – The Suspension Cord (下緒)
How Parts Indicate Quality
Start at the Habaki
Read the Hamon Under Light
Check the Mekugi and Ito
Inspect the Kissaki Last
Frequently Asked Questions
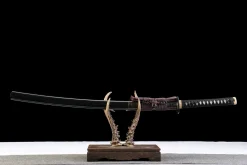
Hand-Forged Katana — Browse the Collection.
Clay-Tempered Damascus Steel Abyss Edge – Hand Forged Clay-Tempered Damascus Steel Katana Sword